Search This Blog

Saturday, 15 December 2012

No 39 - Swedish Christmas Biscuits

About 10 years ago (om ti år siden) I lived in Denmark.  I like the tradition of having the Xmas celebration at night on 24th - we had already started doing that with friends when we lived in London.  In the dark it somehow seems much brighter and more celebratory.  The day-time version does drag on doesn't it...?      Long after I would like to go for a bike ride, or a walk, or just get outdoors.  You never want to go back outdoors after dark.

Anyway another of the Scandinavian Jule traditions I adopted came  from their range of baked goods.  I still make Christmas Cake (that's from my NZ background), and Christmas Puddings (that's for my UK life), and now I also make Peberkager as well.  The only difference is that not having any kids I don't make them big, and decorated with icing to hang on the tree.  This year however I did make a batch for a friend with 2 children and she reckoned her kids (all three of them she said - referring I suspect to her husband, who is a prodigous baker himself) would enjoy the process of icing them and hanging them up.

Swedish Ginger Christmas Biscuits
140 g butter
1 cup brown sugar
1/2 cup treacle
1 tsp cinnamon
1 tsp ginger
1/2 tsp ground cloves
2 eggs
2 tsp vanilla essence
4 cups flour
2 tsp baking powder
icing to decorate
thin ribbon to hang them up

Melt the butter, sugar, treacle and spices in a saucepan over a low heat.  Cool

Stir in the egggs and vanilla.  Stir in the sifted flour and baking powder and make sure it is well mixed.  Divide the dough into 3, wrap each portion in a plastic bag and put it in the fridge for at least two hours.

Heat the oven to 180 degrees C (170 for fan ovens).  Line some baking trays with non-stick paper.  Roll out a portion to about 4 mm thick, cut out shapes and put them on the trays.

Use a piping nozzle to make a hole in the top of each one.  Bake for 5-10 minutes.  They should be firm but they will only be crisp once they have cooled completely.  Cool them on a rack.  Repeat with all the dough portions.

Decorate, thread with ribbon and hang them on your Christmas Tree.

Friday, 14 December 2012

No 38 - Mudcake

While I was as University I worked nearly full time 5 nights a week in a local restaurant.  The owners were head cook and maitre d' together and ran one of the most 'hip' restaurants in town.  They eschewed formal 'cheffing' qualifications and pulled together everyday dishes from a wide range of ultures and countries where they had travelled.  Dishes on the black board menu hailed from around the Mediterranean, Middle East, North and West Africa, Mexico, Indonesia & Japan - and anything else that was tasty, unfussy, fresh & personal.
Daily changes in the blackboard menu reflected that which was seasonally available and as much as possible was purchased from local producers. (And this was the 1980's)

Sue grew a wide range of herbs, and fresh herbs featured abundantly.  My own garden supplemented this on occasion.  We sometimes used quient afternoons when all 'prep' forthe evening was complete, to make up jars of colourful preserves that were displayed on open shelves between the otherwise open kitchen andthe dining room: salted lemons, spiced mandarins, red capsicum jelly, asparagus and red pepper strips, pickled carrot sticks for the antipasti platters, pickled qualis eggs, feta cheese in herbed olive oil & garlic......

Only the desserts and puddings were relatively unchanging -homemade icecreams, cakes, special mousses, and guest appearances using seasonal fruit.

This mud cake was a standard.  I don't recall it ever going off the menu, and it was always in demand.

Mud Cake

Sift together:
2 cups flour
1/2 cup cocoa
1 and 3/4 cups raw sugar (I use golden sugar in UK)
1 tsp baking powder
2 tsp baking soda

then whisk in
2 large eggs
2 cups water
1/2 up oil

And really whisk it lots.  Introduce lots of air.  Give your whisking arm a work out.

This is a really runny mix - don't be alarmed by that.

Line he base of a 9 inch loose botton tin and grease the sides.  Pour in the mix and bake at 180 degrees C (fan oven) for 1 hour. 

Let it cool in the tin.

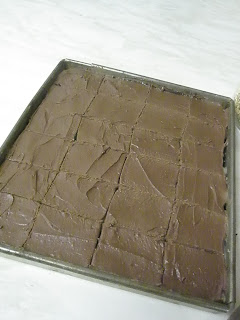
When it is cold use a large knife to slice it into 3 layers horizontally.  Put raspberry jam generously between the bottom and middle layer.  Put raspberry jam AND some of the icing between the middle and top.  Put icing all over the top and sides.

The Icing:
1.5 cups icing sugar
1 cup cocoa
125 g butter
juice of 1 lemon
100 g sour cream.

Sift the dry ingredients, soften the butter and beat all the ingredients together.  I make this in advance, put it in the fridge for a while, then microwave it just before I use it - that seems to improve the texture, makes it  easier to spread, and makes it go really glossy.


Friday, 7 December 2012

No 37 - Lime Marmalade and Pear Cake

As promised I have been working on using up lime and ginger marmalade.  And there were some pears looking neglected in the fruit bowl that went into this cake  (pears and ginger always seem to go well together don't you find?)- so it was very moist, slightly gritty as pear cakes are (as pears tend to be) and was very popular at work - even without icing, which tends to just get stuck all over the place on the trip up to London.
Lime and Ginger Marmalade & Pear Cake

6 oz butter
2 oz butter
1/4 cup golden syrup
2 eggs
5 ox marmalade
10 oz flour (wholemeal if you like texture and believe in making cakes a bit more healthful)
4 tsp baking powder
1 tsp ginger (if your marmalade doesn't have it already - or you like extra)
2 grated pears
1 tsp soda disolved in 1/4 milk

Cream the butter sugar and golden syrup, beat in the eggs, then the marmalade.  Sift in the dry ingredients, addn the grated pears and lastly stir in the soda and milk.

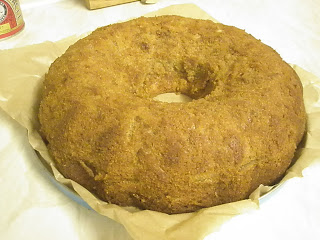
I useda 9" ring tin for this cake - so that it cooks slightly faster.  Grease it well.

Bake at 160 degrees C for 1 hour to 75 minutes.  Cool it in the tin for about 15 minutes.

You could ice it with icing made from icing sugar and  lemon or lime juice - and sprinkle on chopped toasted walnuts if you like some class to your cake.  We just like cake - and this one is quite good as a pudding - still warm with lashings of custard......

Saturday, 1 December 2012

No 36 - Lime Marmalade Cheesecake.

As promised recipe that can use Lime Marmalade....  I am not a fan of gelatine type cheesecakes prefering by far the baked kind, but this went down a storm at home and at work.  (Make sure it is well chilled before you transport it anywhere)

Lime Marmalade Cheesecake

Base (for a 9" loose bottom baking tin):
50 g melted butter
1/4 cup (50g) of castor sugar
1/2 packet of gingernuts smashed up in the blender (of use a strong paper bag & a rolling pin).

Put a circle of baking paper in the bottom of the tin, and press this mix into place.  Chill it while you are making the filling.

Filling:
225g soft cream cheese (full fat)
2 eggs (whites and yolks separated)
1/2 cup castor sugar
juice and grated rind of 1 lemon
150 ml cream
4 Tb lime marmalade
15g gelatine powder dissolved in 4 Tb boiling water

Soften the cream cheese and beat in the egg yolks and half the sugar.  Add the lemon, marmalade and cream and blend well.  Then stir in the well dissolved gelatine mix.

Set that aside until it is on the point of setting.  Meanwhile beat the egg whites until stiff and whisk in the remaining sugar until you get meringue consistency.  Fold this into the cheese mix, pour it over the base, and gently shake the tin to level the top.

Chill fo 3-4 hours. 

Topping:
another 4 Tb Lime Marmalade (that's the best part of half a jar of my runny batch gone by now....)
50 g chopped toasted nuts
Whipped cream

Warm the marmlade (your's won't be runny like mine) enough to make it soft spreading consistency (runny is really good) and spread it over the top and sides.  Coat the top and sides with the chopped nuts. 

Decorate or serve with whipped cream - if your cholesterol count will allow.

Monday, 26 November 2012

Marmalade

I haven't posted for ages, but I haven't been slacking in the kitchen.  For a while all my spare time seemed to be getting consumed by preparations for a charity fund raiser craft sale.  In addition to the sewing, knitting, crochet, there was sweet pickle, banana chutney, red onion marmalade and 3 kinds of citrus marmalade to make.

I turned my back on the Lime and Ginger marmalade just a litle too long and cooked it past the ideal setting point (so had to make another batch for the charity sale orders).  That means I have a couple of litres of runny lime and ginger marmalade to use up somehow.

On that basis I deviated a bit from my objective of baking recipes from my childhood collection, and went in search of interesting things to use up lime marmalade.  Watch this space....

Meanwhile I wanted to share this fantastic pink grapefruit marmalade recipe which is so easy we should all be making pink grapefruit marmalade. 

http://notjustanyoldbaking.blogspot.co.uk/2011/09/pink-grapefruit-marmalade.html

Now that is how a baking blog ought to be - lots of photos, lots of explanation. 

I can't improve on that except to say: know your pink grapefruit - the redder the better.  The first batch I made used ruby grapefruit and was pink/red, the second batch the grapefruits were not so red (more pink than red) inside and the result looked like orange marmalade.

Xmas Trio - Lime & Ginger, Lemon & Honey, Ruby Grapefruit


Monday, 22 October 2012

No 35 - Chocolate Coconut Macaroon Square

Really easy -

Chocolate Coconut Macaroon Square

Melt 150g chocolate in a bowl over boiling water  - or in the microwave.

Line a baking tin (11" x 9" or similar size) with buttered baking paper (butter side up)

Spread the melted chocolate in the tin and put it in the fridge to set again.

Beat 2 eggs until thick,
add 4 oz caster sugar and beat until the sugar is dissolved. 
Fold in 6 oz of dessicated coconut and a tsp of vanilla essence.

Spread the coconut over the chocolate and bake at 135-145 degrees C for about 30 minutes.

Cut into squares while still warm, but leave in the tin until completely cool.

OK - looks a bit weird on the bottom because I melted dark and white chocolate together....

Sunday, 21 October 2012

Savory Muffins

At this time of year we spend our Sunday's yacht racing.  I love sailing but it does sometimes make the weekends seem to short.  Sailing on Sunday, and 5 days of work in London, leaves only Saturday for everything else in life..... including the baking.

The allotment has very nearly been cleaned up - frost took all the pumpkins and courgettes a week ago.  The corn and beans are all harvested.  Only the bassica bed looks well stocked for Winter - that and some Swiss Chard (called Silver Beet where I come from) - nothing much there I can turn into baking (cabbage cake ....hmmmmmm .... although I have to say as an aside that kale in curry sauce - an accidental combination - wasn't as objectionable as might be anticipated).  We spent part of Saturday putting guttering on the shed so that we could collect rainwater for summer watering.  It felt like a mad project given that it has rained solidly for a week and the garden is completely waterlogged again.  

There had to be, however, time for the baking; muffins to feed to the crew on Sunday.  I have a recipe somewhere, but I tend to make muffins up as I go along and savory ones simply depend on what is in the fridge at the time....

Savory Muffins

Into a bowl: a small tin  of corn kernels (drained), some finely chopped up bacon, and some grated cheese (the tastier the better) - roughly equal quantities if you need better guidance - and a finely diced onion,

Yesterday I also threw in some grated courgette, tobasco sauce, and oregano.

2 cups of flour
4 tsp baking powder
2 small to medium eggs
1/2 cup oil  (or a couple of ounces of melted butter)
1/2 tsp B. Soda dissolved in some milk - made up to enough to turn the whole lot into a loosely sticky mess.

Dollop that into a greased 12 pot muffin tray.  Bake at 170-180 degrees C. for 15-20 minutes.

I find that muffins with cheese in them rise beautifully and have a disconcerting way of collapsing as they cool.  Slight overcooking helps to overcome this (and the corn, onion and courgette helps to stop them drying out in the process), or just eat them warm.


The photo is of the few that came back having beat around the Solent in a plastic box

Monday, 15 October 2012

No. 34 - Peppermint Square

This one is a bit too much like the last one - never mind.  One of my favorites as a kid - just because I liked eating sweetened condensed milk straight from the tin (there is always more in a tin that you need for any one thing....)

Peppermint Square

4 oz butter
4 oz sugar
1 egg
6 oz flour
1 tsp baking powder
1 dsp cocoa

Cream the butter and Sugar and add the egg.  Sift in the dry ingredients and spread the soft dough out in a sponge roll tin.

Bake at 170-180 degrees C for about 20 minutes.

Topping - to be poured on while the base is still hot

2 oz butter
2 TB sweetened condensed milk
2 oz icing sugar
peppermint essence (I use the essence bottle cap full, it's probably about a teaspoon)

When all that is cool and set, ice with chocolate icing.  Cut into Squares.

Tuesday, 2 October 2012

No 33 - Keamish Square


I have no idea about the name....  I googled it and it appears to be a surname.  So I assume that sometime in the history of this recipe it was first published or promoted by a Mrs Keamish....

Keamish Square

4 oz butter
4 oz sugar
1 egg
6 oz floour
1 dsp cocoa
1 tsp baking powder

Cream the butter and sugar, beat in the egg and sift in the dry ingredients.  Spread in a greased pan about 8" x 10" (or so), and bake about 20 minutes at 170-180 degrees C.

Spread it over with raspberry jam while it is still warm.  (In this one I used Oregon Grape Jam - which is very dark coloured.)

Topping:

4 oz butter
2 oz icing sugar
1 tsp gelatine - in 2 TB boiling water
Cream the butter and icing sugar, add the dissolved gelatine and beat until creamy.  Spread on top of the jam and when set, cover with chocolate icing.

Cut into squares when the icing has set.


Sunday, 30 September 2012

Crumble Topping

All those blackberries, scrumped apples from wild-growing trees, overripe pears, some late strawberries from the garden... we have an abundance of fruit at this time of year.

Crumble sounds like one of those old-fashioned 'puddings' that grandmothers make, or which are served in pubs, smothered in custard (with or without skin!). The stiky-dry pub version (cloys the inside of your mouth, welds itself to the back of your teeth) involves rubbing butter into flour and sugar. 

This version is much easier, tastier, better textured, and considerably healthier.


Crumble Topping
(for about 8 large apples stewed up, or equivalent in other fruit)

2 Cups Rolled Oats
2 cups Coconut
3/4 cup Sunflower Seeds
1/2 cup Raw Sugar
2 tsp Cinnamon
1/2 cup Oil
1/2 cup Cold water

Mix the ingredients and pat them onto the top of a baking dish of fruit (cooked or uncooked fruit).  Bake 30-45 mins at 170 - 180 degrees C - until golden and crispy on top.

And here is a two person version of a pear and raisin crumble in the making.

Monday, 24 September 2012

No 32 - Fred's Original Bran Muffins

Wow – way too long without adding anything to the Blog.  It’s not that I haven’t been in the kitchen; it’s pickle, jam and chutney season and I have been making batches of preserves for a Charity Craft Sale, and for my Xmas hampers.  I’ve also been taking advantage of a remarkably (considering our wet summer) good supply of blackberries on the hedgerows to fill the freezer with fruit for winter puddings, and to make Blackberry and Apple Crumble on a regular basis.

Despite a waterlogged start the allotment is finally producing enough vegetables to feed us so I have been freezing beans and corn, and turning some of the surplus courgettes into cakes and muffins.  Courgette doesn’t add any flavour to your cake but it does contribute wonderfully to texture, making even bran muffins soft and moist.

This muffin recipe started my own recipe collection.  Prior to learning to make these in the ‘Home Economics’ class at school (aged about 10) all the recipes I baked from were my Mum’s.  Mum never made muffins - no idea why not, but maybe because microwave defrosting hadn't been invented in those (old) days!

The addition of courgettes to these muffins extends their delicious life by another 24 hours or so.  For years after I set up my own household, I would make variations on these a couple of times a week, to eat with soup for our evening meals.  They freeze well and microwave defrosting means you can have a hot fresh muffin anytime.

Original Bran Muffin Recipe
In a pot gently warm:
1/2 cup milk
1 oz butter
1/4 cup brown sugar
1 Tablespoon golden Syrup
When the butter is melted add
1/2 tsp Baking Soda

Pour the contents of the pot into the dry ingredients:
1 cup flour
1 cup bran
3 tsp Baking Powder
1 tsp cinnamon
1 tsp mixed spice
Handful Sultanas

Then add
1 beaten egg

Mix the whole lot up and bake  - 15 -20 minutes at 170 -180 degrees C.  Makes 12.

That's the standard recipe.  In the line after the sultanas add your own - 1 cup (or so) of grated courgette, grated pumpkin, carrot, apple, pear....etc, 1cup of frozen black currants (now that's a good one if you can get them), and 1/2 cup of sunflower seeds, or chopped nuts, etc if you like a bit of crunch.

Sunday, 19 August 2012

No 31 Triple Ginger Biscuits

Following my love of things ginger I thought I'd share this one with you.  Biscuits and squares travel better on the bike than large delicate cakes....


Triple Ginger Biscuits

6 oz butter
1 up packed brown sugar
1 egg
1/4 cup treacle
2.25 cups of flour
2 tsp ground ginger
2 tsp baking soda
1.5 tablespoons minced fresh ginger root
1/2 cup chopped crystallized ginger

Cream the butter and sugar until smooth.  Beat in the egg and treacle.  Combine all the dry ingredients and sift them into the creamy mix.  Lastly add the fresh and cystallized ginger.

Cover the dough and for at least 2 hours (better over night).  I have found that rolling the dough into a log inside some plastic cling-film before refrigerating it, means that you can simply slice it and bake the slices next day.

However if you prefer, you can roll the dough into 1 inch balls, place them 2 inches apart on a baking sheet

Either way, bake them for about 10 minutes at 175 degrees C.

They don't go really crisp, and are great to eat warm.......

Sunday, 5 August 2012

Gooseberry Shortcake

This one doesn't have a number because it never made it to work. 

The gooseberries were ripe enough to pick last week.  Mr B had to pick them while I was at work and I came home on Friday to find a bowl of them in the fridge.  They were ripe enough to eat just like that but I managed to restrain myself.

Last year I ate them straight off the bush.  The bush is right next to the bee-hive, but with only one beehive that wasn't really a problem; they were extremely well behaved bees.  This year we have 4 beehives at the end of the garden, and at least 2 of them have a tendency to stroppiness.  At least the gooseberry bushes are well guarded by day.

Shortcake

4 oz butter
4 oz sugar
2 beaten eggs
2 cups flour
2 tsp baking powder

Cream the butter and sugar, add eggs, then sifted flour and baking powder.  Roll holf of the dough to fit a 9 inch diameter straight sided cake tin.  At this point I put the base in the oven (170 - 180 degrees C) while I roll out the top half.  That bit of extra cooking avoids the soggy-base risk once the fruit goes on.

Anyway - top that with a generous layer of stewed fruit sweetened to taste, or fresh berry fruit (works well with backberries, gooseberries etc) uncooked, and some sugar.  Put the other half of dough on top (I roll it out between two layers of plastic wrap, peel off the top, tip it onto the pie and then peel the second bit off.)

20 minutes to half an hour in the 170-180 degree oven.  Serve hot with cream, or cold in slices as a cake.


Pre-cooked fruit will give you a nice rounded top, the bumps come with using fresh uncooked fruit.....

Monday, 30 July 2012

No 30 - Afghans

A tradition of some sort in NZ, no one seems to know why they were named thus, and I suspect they are just an excuse to eat chocolate icing and walnuts.  However they are easy, great to make with kids, and popular it seems (if my work mates are anything to go by).

Use unsweetened cornflakes, and mash them up a bit otherwise the mix can bea bit crumbly and the 'biscuits' don't hold together properly.

Afghans

6 oz flour
3oz sugar
2 oz cornflakes
1 oz cocoa
7 oz butter

Mix together, squash dessertspoonfuls into a rounded mound, bake in a moderate over (170-180 degrees C) for 16 minutes.  When cool, ice with chocolate icing and top with half a walnut.

(My colleague suggested using Nutella..... now there's innovation for you.)


Pictured with, or without, flash lighting.... the flash certainly makes them look more chocolatey.

Friday, 6 July 2012

No 29 Malt Biscuits

Long gap in there, no break from baking though.  There was all the biscuits, flapjacks, and toasted mueslei I did for the attempt by my work colleagues on the Welsh 3000's. (That had to be postponed because of high winds, and I will be in Norway when they re-run their attempt - The mueslei biscuits were consumed at work; and during our Round the Island Race last weekend.  Scarlet Jester got 7th in class and 85th overall.  We had a good day out).

The day after the Round the Island Race was extremely busy with catching up at the allotment, Portsmouth and District Bee Keepers Association summer lunch time barbeque, and a visit later from friends we hadn't seen for a while.  I managed a batch of Malt Biscuits for this challenge (my paternal grandmother's recipe: she of the shortbread), and a German Plum Cake to feed to my guests.

Apart from the 'cream the butter and sugar' instruction malt biscuits are easy to make, and popular with my baking testers.  The most difficult part might be sourcing 'extract of malt' - that's the stuff Kanga feeds to Roo as strengthening medicine in the Winnie-the-Pooh stories.  When we were children my bother got fed a spoonful of malt extract every day - as strengthening medicine.  I'm not exactly sure what it is meant to add to the diet, but I was extremely narked that I wasn't allowed to eat it.  That might be why I developed a taste for the stuff.  I always have a jar in the cupboard now.

Malt Biscuits

8 oz butter
1 and half cups sugar
3 tablespoons of malt extract  (use a hot spoon dipped in boiling water)
2 large eggs
4 cups flour
1 tsp Baking Soda
2 tablesppons of cocoa

Cream the butter and sugar.  Beat in the malt extract.  Ad the eggs one at a time and beat well aftereach one.   Sift in the dry ingredients and work the whole lot into a very stiff dough.

Turn it out on the bench, squash it around a bit to get all the crumbs to attach and smooth out the texture.  Cut the dough in half and shape into 2 logs which you roll in aluminium foil and put in the fridge for 6-8 hours.

Unroll the foil, slice the logs into biscuits about 0.5cm thick, and bake on greased trays (or baking papers) for about 15 minutes at 170 degrees C.

We used to eat these cold with butter on, but then Kiwis in those days would butter anything.  They don't need the extra butter, but if you are being decadent.......  Family favorite.

Tuesday, 12 June 2012

No 28 - Rhubarb Muffins


These too are from Lindsay - she of the banana cake recipe.   It is scrawled in my notebook in a combination of red and green inks in both mine and Lindsay's handwriting which suggests she might have been giving me this off the top of her head, and had to call me later to fill in the bits she forgot.  (I keep muffin recipes in a pocket sized notebook - no idea why they are separate from my other recipes, and I have dozens of them.)

You possibly also need to understand that these are Kiwi (or possibly US) style muffins (not English style yeast muffins).

They are quick breads which means eat within a few hours (24 max) of baking, or put them in the freezer and microwave them back into life when you want to eat one.

Muffins are quick to make and at their best eaten warm.  I often make savory ones to have with soup as a quick warming lunch or 'tea' in Autumn, or or bake muffins for 'round the cans racing' food.

This recipe (possibly in keeping with the banana cake) is a generous one.  Most of my recipes make 12 muffins, this makes 18 to 24.

Rhubarb Muffins

Beat together 1/4 cup of oil, 3/4 cup of sugar, and 2 eggs

Add 2 cups of milk, 1/2 cup of plain yoghurt and 1 tsp vanilla.

Stir in 2 cups of chopped raw rhubarb

Sift in: 4 cups of self-raising flour
              1/2 tsop baking soda
              1 tsp cinnamon

Spoonfuls into greased muffin pans (I put hald spoonfuls, a tsp of cream cheese and then the rest of the muffin mix making sure th cream cheese is enclosed).  Sprinkle brown sugar on top if you like a bit of extra sweetness or brown topping.

Bake at 170-180 degrees C for about 20-25 minutes.


Tuesday, 5 June 2012

Mum's Bacon and Egg Pie

Bacon & Egg Pie is picnic food tradition in our family.  I hope you discover how easy it is to be impressive with this pie.


Another weekend spent yacht racing: Cowes to Deauville (and getting back).  I missed the Jubilee River Pageant, and given that I have lived on (literally ON) the Thames for the best part of the last16 years, that is unforgiveable.  I hope those of you who were there enjoyed a spectacular. 

In the spare hour I had before we left on Friday, I threw together one of my mother's reliable stand-bys - a bacon and egg pie - for 'easy to eat racing food'.

Half of it was gone before we made the start.....

Bacon & Egg Pie a la Diana

Line a fairly large roasting dish with ready rolled flaky pastry/puff pastry,

Cover the bottom with bacon - either strips of streaky or chopped up bacon ends. 
Sprinkle a generous quantity of frozen peas over that

Beat up enough eggs to cover all that (with 1/4 pint of cream if you like rich) add ground black pepper, and pour it in.


Decorate the top with sliced tomatoes and strips from any left over pastry

Bake at 200 deg C until the egg mix is set and pastry golden.


(For an even more substantial pie, chop up any left over boiled spuds lurking in the fridge and throw them in with the peas.)

Eat hot (with homemade tomato ketchup) or cold, or slightly warm.  Freeze leftover slices (or make extra for the freezer).  Thawed and reheated works well too.

Bacon & Egg Pie is picnic food tradition in our family.  I hope you discover how easy it is to be impressive with this pie.

Tuesday, 29 May 2012

No 27 - Honey Fruit Cake

The bees have been looking for new homes.  We ran out of hives to put them in.  Meanwhile someone from Mr B’s beekeeping class, having had a run of bad luck with his bees, decided that perhaps this was not for him and offered us his three hives – sans bees of course, but still laden with stores that his bees had put away before departing his ‘care and control’ (if bees could ever be said to be within anyone’s control; as we have discovered).

The honey contained in these frames was set completely solid so the only way to ‘extract’ it was to cut the whole lot from the frames, pile it into a cauldron and heat it very gently.  At about the halfway mark I have bottled up about 6-8lb of very dark rich honey, and set aside a couple of good sized slabs of wax for soap making.  Because the honey has been heated I will keep it all at home for baking and making mueslei.

I thought I had a recipe somewhere for a fruit cake that used a lb (454gm) honey but I can’t find it, so searched the web and found a great selection of honey recipes on this website. I like to promote beekeeping and beekeeping websites, so you will find this in my list of links as well.

I modified this recipe to use only Mixed Dried Fruit, then doubled it, and I boiled my fruit (which was a bit hard and dry) in a whole 440ml can of Guinness, and proceeded from there.  The cake is definitely rich, with strong honey flavours and just a hint of Guinness.  Even sliced up and packed in a large plastic box it survived the motorbike ride in my backpack.

Honey Rich Fruit Cake

4oz. Mixed Dried Fruit
4oz. Sultanas
4oz. Dates
2oz. Dried Apricots
2oz. Cherries
 ¼ Pint Beer
4oz. Butter
6oz. Honey
2 Eggs
4oz. Plain Flour
4oz. Whole Self-Raising Flour
½ Tsp Spice

Cream butter and honey together. Beat eggs and add alternatively with sifted flour and salt to creamed mixture. Add fruit and enough beer if necessary to give a dropping consistency.
Turn into well greased 7 inch round tin (or 2lb. loaf tin) and bake on middle shelf for about 1¼ - 1½ hours in a pre-heated oven (300°F/150°C)
Allow to cool a little then turn out onto wire cake stand and leave to cool.

Thursday, 17 May 2012

Yacht Racing

Race starts at Harwich tomorrow morning, goes across to Holland by some route around the North Sea, and we won't be back until late Sunday.  So I won't get any baking done this weekend. 

A lovely lady at work has just given me a gift of some baking ingredients, so I shall put my thinking cap on and find recipes that use them.  What are your best recipes with ground almonds?  All help gratefully accepted, atributions given....  just click on the word 'comments' below this and send me yours.

Monday, 14 May 2012

No 26 - ANZAC biscuits

This recipe came out of a New Zealand icon - the Edmonds Cookbook.  I have been told that in the early days of the book's existence (written to promote Edmonds baking products, strapline: "Sure to Rise"), the Edmonds used to send a copy to all newly engaged women.  I assume that they got the details from the engagements announced in the country's newspapers.

Generations of us have grown up with the Edmonds Cookbook, and more than one mother has deemed it an essential for a son leaving home to do so armed with a book of Edmonds' cooking wisdom.

My recollection of the copy at home was an A5 sized soft covered book  (a picture of the Edmonds Factory with its "Sure to Rise" icon on top, and the beautiful gardens it was also famed for in front), dog-eared and stained with years of baking spills, falling open at the Queen Cakes recipe.  (Since those days sprial binding transformed recipe books.)

ANZAC Biscuits

2 oz flour
3 oz sugar
2/3 cup rolled oats
2/3 cup desicated coconut
2 oz butter
1 Tb golden syrup
1/2 tsp Baking Soda dissolved in 2 Tb boiling water

Melt the butter and golden syrup together and add the soda and water.  Pour the wet ingredients into the mixed dry ingredients and stick it all together.

Drop teaspoonfuls onto a greased baking sheet and bake in a moderate over for about 15 minutes, until spread out and golden all over.

They range, depending on your mix, from a bit sticky in the middle and crunchy round the edges, to crunchy all the way across.  Take care as they can burn quite quickly after passing the stage of being 'ideal'.  For the English cooks out there - think slightly sticky hobnob.

Thursday, 10 May 2012

No 24 - Spiced Date Triangles

Given that we were at No 14 when I let someone talk me into this blog, it has taken me a while to catch up with myself.  This is it - when this goes on-line I will be up-to-date and can concentrate in getting some photos together to illustrate some of the entries.  I never realized that this blogging business would require me to be so organized about baking.  Writing the recipes down has been the worst bit; I can't make all this up as I go along.  I have had to work out a measurement for some of the guesstimates I regularly use!

Here is a proper recipe and another one for those little biscuit things that go well beside a cup of 'sterk' coffee.

Spiced Date Triangles

2/3 cup (110 g) chopped pitted dates
1/4 cup (60ml) golden syrup
1 TB water
2 tsp cinnamon
2 tsp ginger
1 tsp mixed spice
1.75 cups (260 g) plain flour
1 cup (125 g) ground almonds
1/2 cup (100 g)firmly packed brown sugar
125 g butter, chopped
1 egg, lightly beaten
1 egg whie lightly beaten
1 Tb cinnamon sugar
3/4 cup (60 g) flaked almonds

Combine dates, syrup, water and spice in a pot and simmer for 2 mins; cool.

Combine sifted flour, ground almonds and sugar, and rub in the butter.  Add the egg and the cooled date mixture, stir well, knead gently and using a piece of foil to wrap it in, shape the dough into a long triangle (big Toblerone comes to mind).

Refrigerate it for 1 hour and then slice about 5mm thick, place them on greased oven trays, brush with egg white and sprinkle with almond flakes.

Bake about 12 mins in a moderate oven (that's 170 to 180 deg C)

Makes about 55.

Monday, 7 May 2012

No 25 - Friesland Dumkes

I've been away from home for three weeks.  While I've been away we've finally reached the top of the Council's list for an allotment, I did some motorbike touring in Nederlands, and I attended a course on Managing Maritime Emergencies at the Smit (salvage) facilities in Rotterdam.  Great course - I recommend it to anyone in a relevant industry.

I met some really great people, and had a fairly comprehensive look at Rotterdam.  I'll reserve my comments on Rotterdam as my impressions were unfairly blighted by rain quite a bit of the time.  Touring in the rain - particularly on a motorbike - doesn't have a lot to recommend it.

Before the course we spent a weekend in the north to go to the World Superbike racing at Assen.  Assen is a lively place, great Saturday market, nice outdoor bars, good mix of the old and the new.  In fact we arrived the day they opened their 'arts' complex - theatres, library etc.  Interesting installation on the steps outside - pillars with some sort of proximity trigger that makes them light up and make surreal sounds when you get close to them.

We stayed in Appelsha.  Like most establishments in Continental Europe when they serve you tea or coffee you get a little biscuit on the side.  Nowhere in Nederlands that week did I get one of those per-packaged factory models of biscuit.  They were all the 'specialty' of the house.  Commendable.  I fell in love with the Dumkes that accompanied that first much needed cup of tea on arrival at Appelsha.

So I looked up Freisland Dumkes on the internet and this is what I got:  (the ones I've made taste great, but I might have been a bit more generous with the size than the 'dunkers' that were served with tea)

Freisland Dumkes (thumbs)

150 g butter
150 g dark brown sugar
 2 eggs
250 g flour (sifted) with a pinch of salt
100 g hazelnuts (chopped finely)
1 tsp anise seed - crushed
1 tsp cinnamon
1 tsp ginger

Heat the oven to 150 deg C.  Cream the butter and sugar, beat in the eggs one at a time untiil foamy.  Sift in the flour and add the nuts and spices.  Knead the dough until smooth, roll it out about 1cm thick, cut into strips 2cm x 4cm and bake on a greased (or teflon) sheet until browned.


I think you are meant to press them with your thumb when they come out of the oven - to make a thumb impression, but I skipped that step.  I'm sure they taste the same without the markings - and as I have been struggling all this weekend to dig buttercups and docks out of a waterlogged allotment, my hands are looking a bit stained at the moment (which might have added unwanted flavour to the Dumkes).

I'm about to go and do a second lot of baking today.  My motorbike had been in need of a carbs rebuild, a job which has been sorted out beautifully this week by the hardworking and extremely decent blokes at Chas Bikes in London.  The least I can do I drop off some sultana biscuits on my way back into London on Tuesday morning.  My gratitude is immense.  The bike still perfomed acceptably at speed but the effort of nursing it through towns and filtering at lower speeds was really beginning the wear me down last week.

Saturday, 28 April 2012

No 21 - Enormous Banana Chocolate Chip Cake

Banana Cake

At the time I started university in 1987, I had a late-Victorian ‘semi’ divided into 2 flats.  I lived downstairs and my tenant upstairs covered my mortgage.  At one change of tenancy a woman turned up to view who seemed altogether too well dressed to want my scruffy flat in our tired part of town.  She was a manager at the city’s only professional, live, theatre company.  Imagine my surprise when later that year Lyndsey turned up in my law class.  She was studying and holding down a job (like me) and had resolved her housing situation by buying an equally aged and equally impractical home – equally in need of some TLC in a nearby suburb.  We became firm friends, sharing interests in growing food, cooking, and studying law; and she educated me in theatre and travel. 

It is one of my great regrets that I lost contact with Lyndsey when she married and moved to South Australia, and shortly after that I moved to England.  I still have her banana cake recipe, and think of her often.  I know she had two sons but they will be young men by now. 

Like her this recipe has travelled too.  For many years after arriving here I lived in a yacht.  Our boat had no oven and I became adept at improvisation (in true theatrical style): producing all cooked food on 2 Diesel-cooker hot spots with 2 pots, 1 frying pan and a 10 litre pressure cooker.

Working on the principle that steamed pudding can be achieved in the pressure cooker, I decided to experiment with it producing bread and cakes.  Steamed bread is OK but  lacks crust.  We preferred the frying pan bread.  However Lyndsey’s banana cake was a great success by this means and was for years virtually the only cake produced in out ‘mobile’ home.  (I say virtually , corn bread eaten with jam was later discovered and deemed acceptable as cake but had to be eaten really fresh.)

I have adapted it a bit to make this big (birthday) cake, adding pineapple to ensure the large cake stays moist with all the extra baking time needed.

Enormous Banana Chocolate Chip Cake


16 oz oil (weighed)
1 cup brown sugar
4 eggs
12 bananas, mashed with 2/3 cup golden syrup
large tin of pineapple, drained and chopped
6 cups flour
4 tsp baking powder
4 tsp baking soda dissolved in 1/4 cup of milk
2 packets of dark chocolate nibs.

Grease and line a roasting tin about 12" x 16" and at least 4" deep.

Beat oil and sugar together.
Add eggs one at a time and beat well.
Add the mashed banana, the pineapple, and choc chips.
Sift in the dry ingredients.
Add the soda and milk.

Bake at 160-170 C, for 1-1.5 hours.  Test with a skewer - it should come out clean.

Cool in the tin.  Turn out onto a large tray and ice with lemon/cream cheese icing (see the carrot cake icing recipe at No 12.)


Thursday, 26 April 2012

No 16 - Sticky Lemon Cake

This recipe first saw the light in my kitchen for my partner’s 50th birthday.  There was a huge party, 2 roast shoulders of pork, 2 shoulders of mutton in a Moroccan stew, gallons of chilli beans, and a table groaning under salads and bread, fruit, cheese and a roasting dish sized banana cake.  (I’ll get onto banana cake eventually.)  I wanted something  that was sharp and flavoursome in small servings and settled for this cake.

I love cakes with ground almonds.  I love cakes with yoghurt, and I love lemon sweets (Lemon ice-cream, lemon baked cheesecake) so this ‘ticked all the boxes’.


Sticky Lemon Cake
175 g (6oz) unsalted butter
250 g (9 oz) castor sugar
2 lemons
3 eggs
75 g (2.5 oz) plain flour
2 tsp baking powder
150 g (5.5 oz) ground almonds
150 g (5.5 oz) natural yoghurt

Preheat the overn to 170 C.  Grease and line an 8" deep spring form tin
Cream the butter and 150g (5.5 oz) sugar.  Add grated zest of both lemons.
Gradually beat in the eggs one at a time.
Mix the dry ingredients, then fold in the creamed mix.  Stir in the juiceof one lemon and the yoghurt.
Bake for 40 minutes (till the cake is firm to touch).  Do not open the oven for the first 20 minutes.
Leave the cake to cool.
Heat the remaining sugar and lemon juice, skewer the cake a few times and pour the syrup over the cake.
Leave it to cool completely before removing it from the tin.

Sunday, 22 April 2012

No 15 - Chocolate Beetroot Brownie


Chocolate Beetroot Brownie

Now this is a brownie worthy of the name.  I love beetroot; it’s one of my favourite vegetables.  It makes great  soup (and not just borscht – perhaps when I’ve finished this baking challenge I’ll just put some of my favourite recipes on here, like beetroot and coconut soup).  I preserve it sliced in a vinegar brine and eat loads in cheese sandwiches (my favourite). And it’s easy to grow if your garden has clay soil.

I spent a year in Denmark a few years ago working in a restaurant kitchen.  Beetroot (rødbeder) is a staple in their food world and I learned preparations and uses for beetroot I never imagined before.

Unfortunately for beetroot, there is nothing subtle or secretive about it; cook it and bright pink splotches appear in every part of the kitchen.  Nothing provides so much evidence of what you’ve splashed and what you have touched as beetroot does.  (Mind you I don’t mind getting my hands in it to skin the cooked beetroot so I might be a bit messier than the averagely stain conscious person).

Before this weeks baking, some beetroot had been languishing in my fridge for a few weeks while I psyched myself up to this recipe.  It turned out to be superbly easy.  I didn’t use the food processor – I flung the cooked skinned beetroot in a blender with all the eggs together and whipped up a delightful pink egg nog.

The rest went by the recipe except that I used plain white flour instead of rice flout (of which I had none).


This website is so good I have put a link to it in the ‘Try this….’ box of links over there on the right…->

No one spotted the beetroot without being told.  It’s a beautifully moist, smooth brownie.  There’s a hint of beetroot taste to those in the know (well to me anyway), but I had to tell.  Well you know what beetroot does it you eat it.  Even cooked in a cake the pink dye passes  through your kidneys.  So Louise and I figured that knowing they’d consumed beetroot might provide the answer to a puzzle for the cake-testers at work.